I own an Amana bottom freezer refrigerator that is just over a year old. Ice has been accumulating in the bottom of the freezer compartment and there is occassionally a puddle of water on the floor. I opened the freezer door and let the ice thaw and melt and that seemed to work for a while. But, now the problem is back and I’m thinking it may be a problem with the drain. The model number is ABB1924WEQ
Jeff/APP Team
We are having the same issue with our Amana bottom freezer. However, our model number is AFI2538AES7. Could it be the drain too or could something else be the issue? Would we try to fix it the same way as your post above? Thank you for your advice.
~Jessica
Hello Jessica. Yes, it could be the same issue. Try the method above and see if it resolves your issue. Thanks!!
Hello all. What a coincidence that this thread was on top. I have the same issue but my Amana model # is: ABB1924WES1.
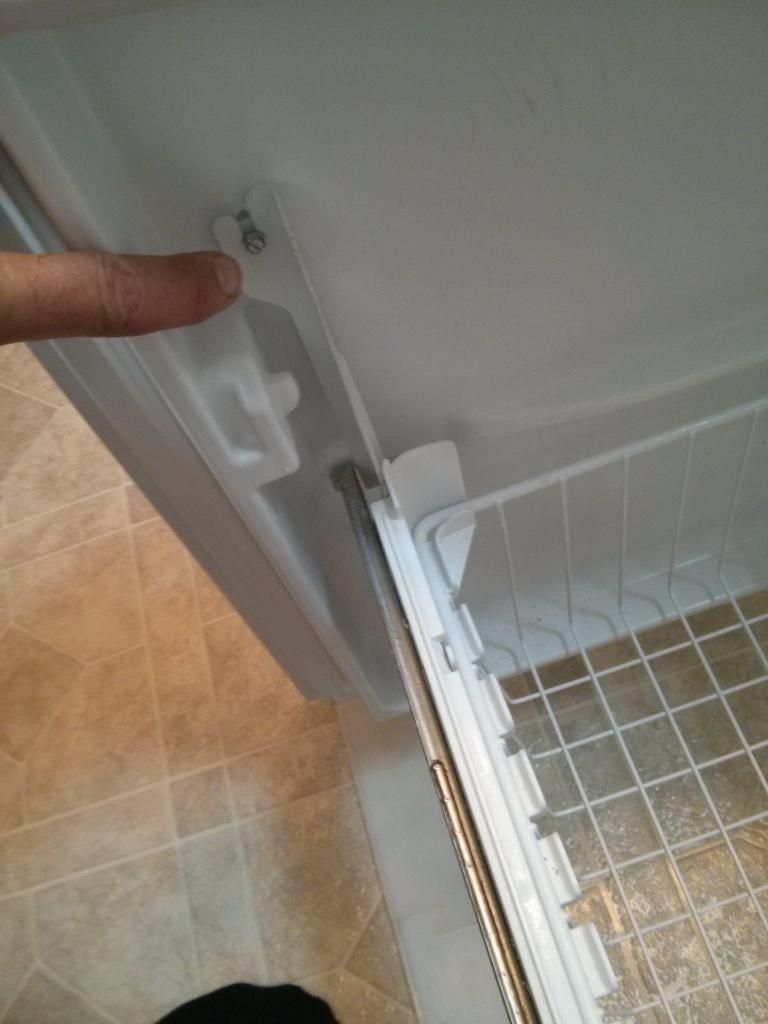
I have had the fridge for about 2.5 to 3 years. Recently, we’ve been seeing water at the bottom of our fridge. After a lot of research, I believe it’s a clogged condensate line that is typical of this model and noted in this thread. I have a good grasp on how to fix it but what I cannot seem to figure out is how to remove the freezer basket. I need to remove it in order to gain access to the back panel and remove that to access the condensate line. I have tried to pry it, lift it and everything except break it but nothing. There seems to be a couple of clips holding it in place on each side but I can’t figure out which way to shimmy the basket to make it work.
Any thoughts? I have attached a photo of the connection point at one end.
Thanks in advance!
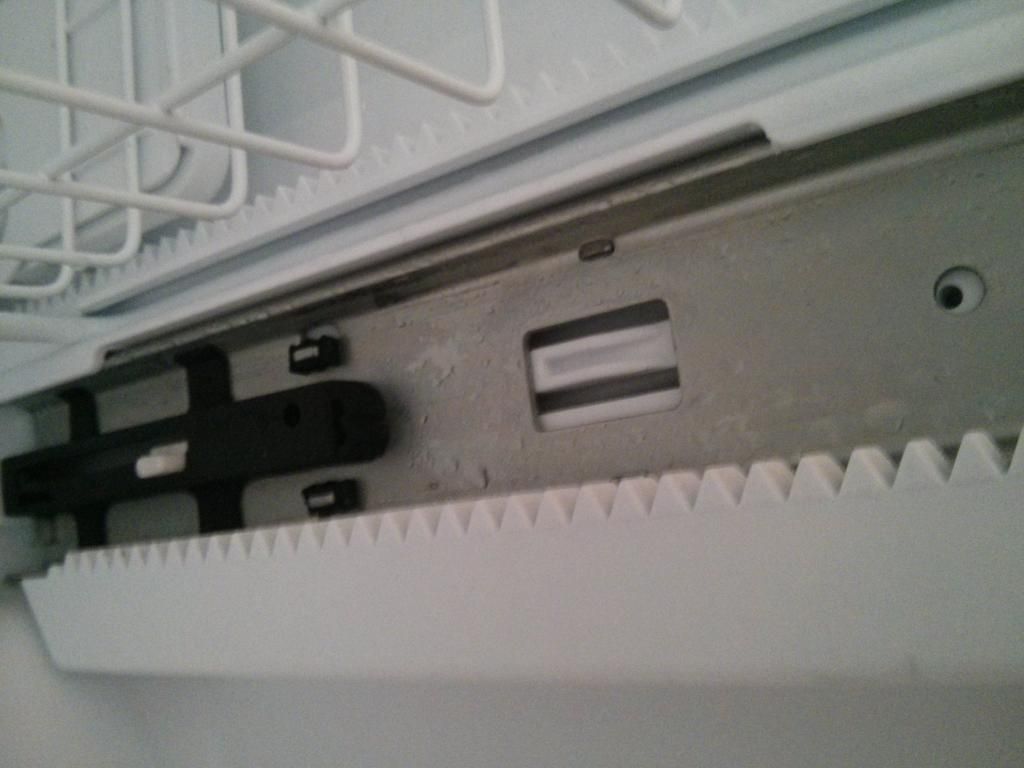
Remove the door and the basket from the freezer by pressing on the locking tabs in the photo you provided.
Press the tabs and remove the glides out of the freezer.
Remove either the left or right glide rail to remove the back panel.
Remove the center air grill by pressing the tab in the center with a straight screwdriver and pry toward the center in the two slots on the sides of the grill. remove the thermostat cover on the right side by prying the slot with the screwdriver.
Now remove the screws holding the panel in place, and remove the icemaker, if your unit has one.
Remove the back panel from the unit.
Thank you for the response!
Are you saying that I have to take the actual door off in order to take the basket off?
Is the process for sliding the basket out like this: 1)press both tabs in 2) slide basket out slightly and then do the same on the other side? I thought I tried that but the darn thing is so tightly jammed in. I will try again.
Thank you!
Hey everyone. Im having the same issue. Periodically pool of water flowing from the freeze door. And the floor of the freezer has a nice layer of ice.
I have an older model side by side amana fridge/freeze. Is it possible to get directions how to do this. Im a bit confused whAt i need to do within the freeze,and what from the back where the fan is. Th ks
I had the same problem. Called repair and defrosted freezer prior. He "fixed" it and it happened again. Said I had to defrost again. I didn’t I now have the thermostat set to "1" on the freezer and "3" on the fridge and no more problem.
In the end i opened up the freezer in the inside, and found it full of ice. Defrosted.
The main key, was underneath the freezer at the opening to the rain tube. That wqs plogged with guck. Took that out. M ade sure the oassage was clean by pushing water into it and seeing that it runs clean. Nw everythig is ok.
Hello All,
I am having same problem with condensate not getting to the pan under the fridge. I have the rear freezer panel off & can see the coils. They did have a little ice on the bottom… I can not find the drain hole under the coils!? How do you get to the holes?
Everything worked fine for a couple years & started messing up past couple weeks…
Thanks for your help!
For an Amana ABB1924WEW1 bottom mount - side out freezer drawer model - do I still have to remove the slide out drawers or can I get to the condensate drain from the back of the fridge once I remove the back panel?
You will need to remove the drawer.
Last night I turned off the water inlet for the ice maker and this morning the bottom of the freezer compartment is dry. That is making me think the issue I have has to do with the ice maker and not the condensate drain.
I had noticed a thin layer of ice last night on the top back ledge of the freezer compartment. That ice is still there this morning but given that there is no new ice on the freezer floor - is it worth me waiting a day or so to see if the problem goes away? or does the presence of ice on that ledge indicate the drain is plugged? See photo.
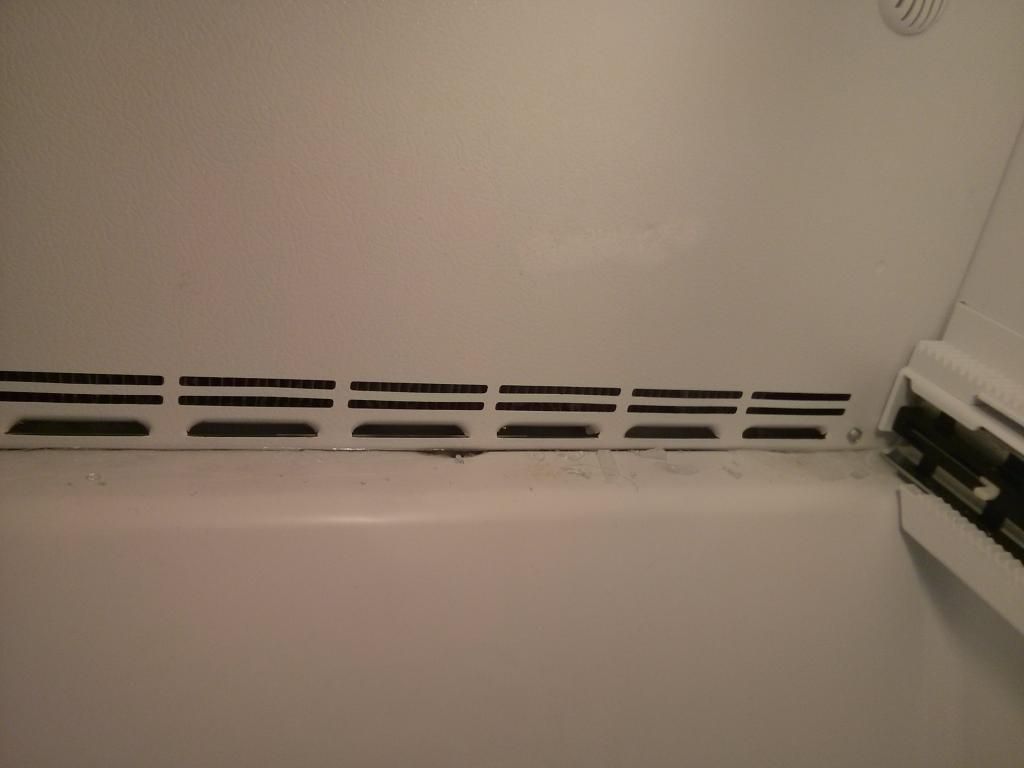
It does look like the drain is clogged. Give it a day or 2 and see if the water comes back. Then you will know for sure that it needs to be cleaned out.
I took another photo and it does look like some of the condenser fins are ice clogged so I think i will open her up anyway.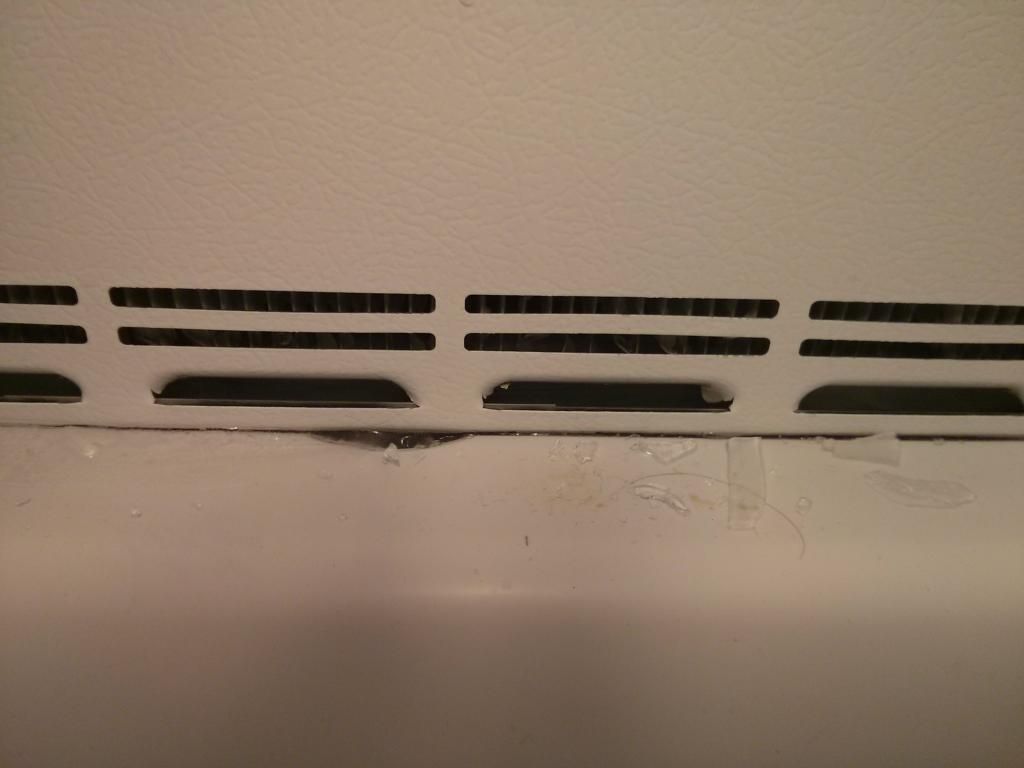
Oh so you mean to wait and see if the condenser fins and drain opening clear up through future cycles?
It will not clear up on it’s own. If the drain is clogged, it will need to be cleaned out. And looking at the photos, it looks like it needs to be cleaned out.
Can you provide a short list of what has to be taken apart? I think it is - first remove the drawer face from the sliding lower basket. I saw a couple of screws at the bottom that I surmise will remove the drawer face.
Then …yet to be determined how - remove the 2 sliding baskets.
Then remove the drawer tracks
Then the ice maker
and then …
I will post photos as I go along to make it easier for future visitors.
You will need to remove the drawer, baskets, icemaker, fan cover, thermistor cover in the upper right corner, and then the back wall. Once all is removed, you can access and clean out the drain under the evaporator coils.
First I removed the front drawer face held on with 4 screws - I loosened the screws a bit and had to jiggle the drawer face a bit to get it off the screws.
Then I unscrewed 2 screws holding in the front of the upper track.
I tried tugging on the lower and upper white plastic tracks attached to the freezer side but they would not budge. Then I noticed 2 push in clips on the lower tracks further inside the freezer. I pressed on those clips and again tried tugging on the upper and lower white plastic tracks - to no avail. Turns out those clips release the metal tracks from the white plastic lower tracks…D’oh!!
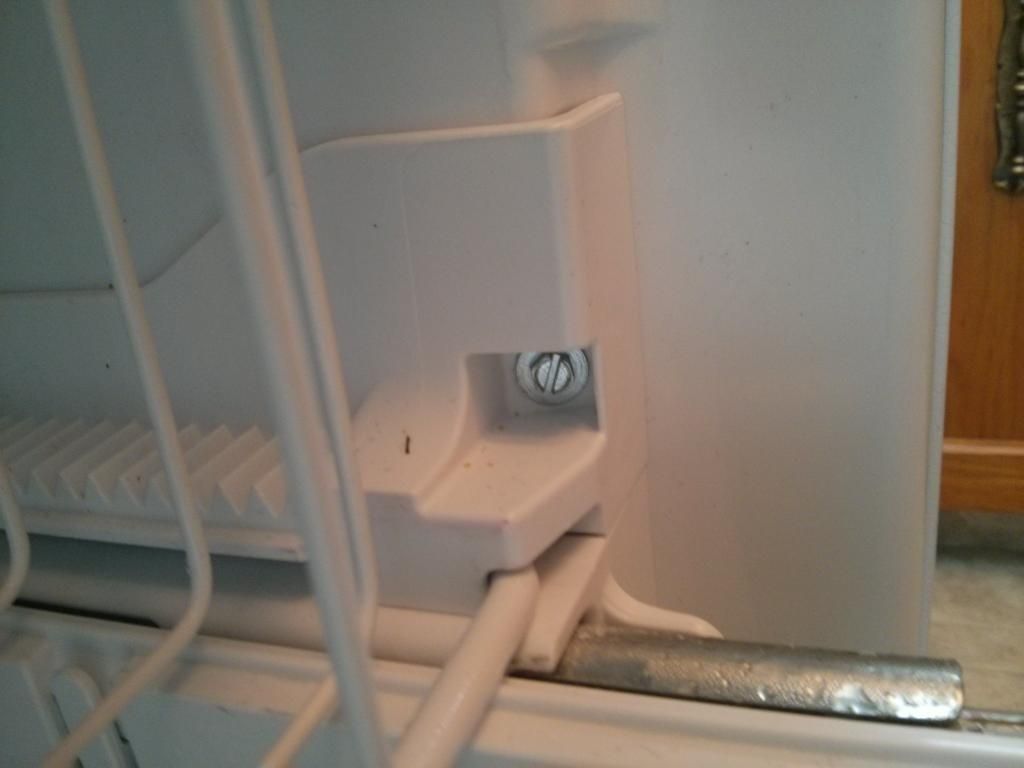
I removed the lower basket - it just lifts out. Then I then tried pulling out the metal tracks - and they came out!! In hindsight the white plastic tabs I pushed in would be what released the metal tracks. The whole track assembly was pretty flimsy - so be careful to hang onto both sides to prevent something from warping.
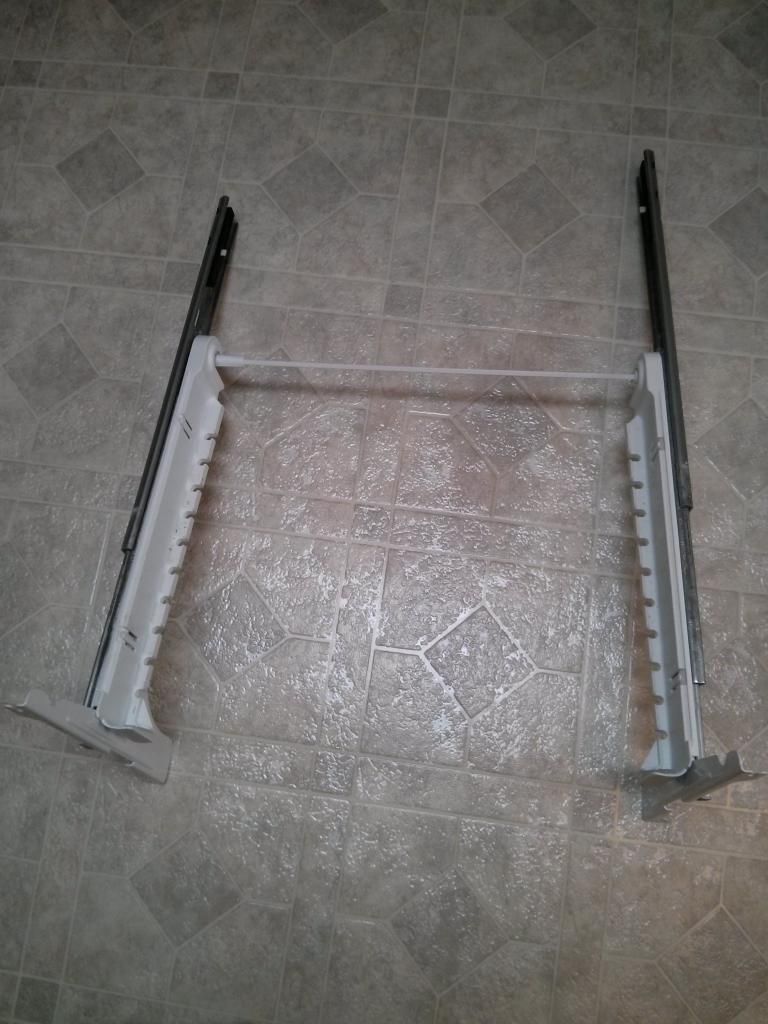
I was stymied at how to remove the upper tracks - then I slid the upper rack out to the end of its travel (again be careful here as the track assembly is now floppy) and tugged / carefully pried at the back part of the track - and it popped out! This photo shows the end of the track - with some sort of blade /stabbing thingie to attach it to the back of the freezer. It turns out i was supposed to press the two tabs on each of the square things at the far end of the upper rack and at the same time lift the square thing up. Doing that on both sides allows the rack to be removed from the freezer and the plastic tracks to be swung inward and removed. More about that later on.

I then unplugged and removed the ice maker. Note - have a cloth ready as defrosted water is going to be dripping onto the freezer floor at this time.