GE Profile washer makes a humming sound in Agitation mode that seems to be coming from the back of the washer, not the motor. The motor make no attempt to rotate in agitate mode. In Spin cycle, the motor turns the basket about 1-1/2 turns then appears to bind so that the outer basket twists, then the spin stops. Opening and closing the lid will cause repeated 1-1/2 turns, but that’s as far as it turns. Just like the motionless basket in Agitate mode, after the basket makes the 1-1/2 turns, there is a humming that sounds like it’s coming from the back of the washer. The belt looks good, the water fill valve and the emptying pump appear to be working okay. In 2006, while under warranty, GE replaced the whole drive system with an upgrade kit that included a clutchless motor and new transmission. They left the old transmission, which the repairman said was probably okay. Anyway, what could be today’s problem? Thanks
With washer off, try rotating the motor pulley by hand. In the CCW direction (viewed from below) it should be easy to rotate and this will cause the agitator to go back and forth. In the CW direction, it should release the brake and cause the transmission and basket to rotate. It will be a little more difficult in this direction and you need to use two hands to keep the pulley moving as the brake will grab as soon as you stop rotating. This will rule out a transmission problem. There should be nothing electrical in the back of the washer to make a humming sound. It could be a faulty control board behind the control panel that may sound like it’s coming from the back of the washer. The motor upgrade has a capacitor and relay that should be mounted on the right side behind the front panel. There may be a problem with one of those items. Are you sure the humming is not coming from the motor?
Eric
— Begin quote from fairbank56;816678
With washer off, try rotating the motor pulley by hand. In the CCW direction (viewed from below) it should be easy to rotate and this will cause the agitator to go back and forth. In the CW direction, it should release the brake and cause the transmission and basket to rotate. It will be a little more difficult in this direction and you need to use two hands to keep the pulley moving as the brake will grab as soon as you stop rotating. This will rule out a transmission problem. There should be nothing electrical in the back of the washer to make a humming sound. It could be a faulty control board behind the control panel that may sound like it’s coming from the back of the washer. The motor upgrade has a capacitor and relay that should be mounted on the right side behind the front panel. There may be a problem with one of those items. Are you sure the humming is not coming from the motor?
Eric
— End quote
Thanks for that helpful info & Qs. I’ve been out all day and just now got to follow your reply. It will be Thursday afternoon before I can follow-up to this post and try something else. But we did check a few minutes ago that the pulley rotated fairly freely in both directions, with the agitator working when rotated CCW and the drum turning in the CW direction. The hum is probably coming from the motor and was reflecting off the back panel of the cabinet and appeared to be from somewhere else. FYI, there is no smell or odor of any kind that would indicate a fried motor. I just now read all the old posts whose links I found at the bottom of your reply. One dealt with a direct drive model called a Hydrodrive. Although mine has a transmission, some of the other symptoms are similar, such as lots of small bits of rubber under the washer, which I have, wherein the motor sensed belt slippage and would not run. But since the motor does not attempt to run in agitate mode, there is no opportunity for it to detect belt slippage, or so it would appear. I can see that the top edge of the belt is frayed exactly as described in one of the old posts. When I return this afternoon, I’ll have a new belt with me just in case that is the culprit. I’m thinking I will first try the reset technique for the Hydrodrive motor to see if that will work for me. And I’ll look to see if I have any of the blinking lights mentioned in the troubleshooting for the Hydrowave. I’ll do that before I remove the belt. If no change, I’ll remove the belt and see if the motor will run in spin cycle mode w/o a belt. If it does, I’ll put enough water in it to see if it the motor will also run in agitate mode w/o a belt. If both of those work, I’ll install the belt and see if it will still run. If the motor doesn’t run w/the belt off, I suspect I either have a bad motor or it’s not getting power. If it runs with the belt off but not with the new belt on — I’m not sure what that means. Next I’ll look for the capacitor & relay that you mentioned, but I’m not sure how to troubleshoot them. I did notice a small relay midway in a wiring harness along the inside of the cabinet. If the motor is the possible problem, I’m wondering if the person who replaced the motor in 2006 was incorrect when he told me it was a clutchless upgrade. My motor looks identical to the WH49X10035 shown on your site as having a clutch. The large round thick metal device above my pulley certainly looks like the clutch in your photo! This afternoon I’ll look for a motor model # and check to see if it’s in the WH49X10035 replacement list. In the meantime, if my rambling has not been too severe, maybe you will see this response and suggest some other sequence of action when I return this afternoon with a new belt. Thank you.
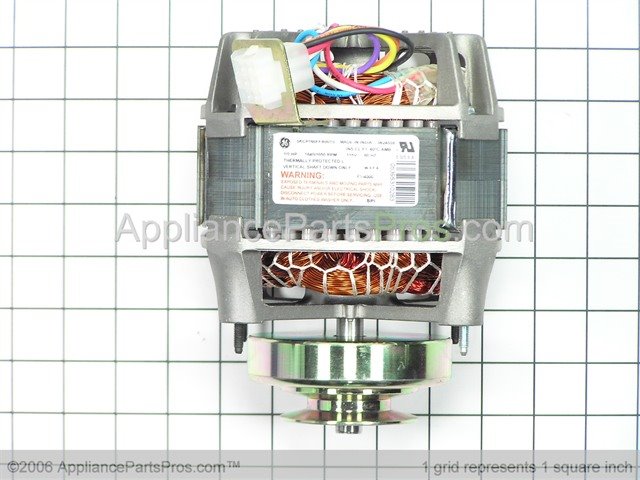
Your system does not have the motor/inverter of the hydrowave type that has the error code LED nor does it have a reset feature for the motor. Do you have a multimeter? One will likely be needed to troubleshoot this problem. If this is the motor you have, it is the correct replacement for your washer. The old motor that they removed from your washer is totally different looking.
Eric
— Begin quote from fairbank56;816852
Your system does not have the motor/inverter of the hydrowave type that has the error code LED nor does it have a reset feature for the motor. Do you have a multimeter? One will likely be needed to troubleshoot this problem. If this is the motor you have, it is the correct replacement for your washer. The old motor that they removed from your washer is totally different looking.
Eric
— End quote
Yes. The motor looks like the picture and I have a multi-meter. FYI, the motor nameplate shows: 5KCP160FFA001S, UPC 02491110338, 1/2 Hp 1640/1050 RPM. Despite the rubber bits on the floor and a slight fraying on the top belt edge, I noticed that the belt doesn’t look worn and is still riding at the outside of the pulley.
I would first check motor winding resistances. Unplug motor connector and check at motor receptacle. Orange to blue should be about 2.8 ohms, orange to white 5.9 ohms, black to red 4.7 ohms, black to violet 6.6 ohms, yellow to orange 0.0 ohms. At the harness connector check between yellow and white. This checks the relay coil which should be about 3.35 thousand ohms.
You can place the washer in service mode so that you can set it for spin, agitate low, agitate high directly. Press/hold start button and rotate dial 180°, release start button, all LED’s should light up. Rotate dial one click to the left will be spin high, one more click is pump, one more click is fast agitate and one more left is slow agitate. With motor unplugged, you should be able to hear the relay click when switching between agitate low and high. If motor windings check out and relay is operating, you will need to make some voltage measurements.
Eric
— Begin quote from fairbank56;816857
I would first check motor winding resistances. Unplug motor connector and check at motor receptacle. Orange to blue should be about 2.8 ohms, orange to white 5.9 ohms, black to red 4.7 ohms, black to violet 6.6 ohms, yellow to orange 0.0 ohms. At the harness connector check between yellow and white. This checks the relay coil which should be about 3.35 thousand ohms.
You can place the washer in service mode so that you can set it for spin, agitate low, agitate high directly. Press/hold start button and rotate dial 180°, release start button, all LED’s should light up. Rotate dial one click to the left will be spin high, one more click is pump, one more click is fast agitate and one more left is slow agitate. With motor unplugged, you should be able to hear the relay click when switching between agitate low and high. If motor windings check out and relay is operating, you will need to make some voltage measurements.
Eric
— End quote
Thanks for that info. Ohm values were within 0.1 Ohm of your spec on all items EXCEPT an open circuit between orange & white to the relay coil instead of 3350 ohms. (Washer was unplugged when I did the relay coil measurement.) All the Service Mode functions provided the desired action and sounded and looked normal EXCEPT slow agitate, which just gave a hum but no motor running. I was so glad to hear the motor running at all, but when slow agitate was a no-show it was quite a bummer. I repeated to be sure. Rats! I could hear the relay click as you mentioned. What next?
Sounds like the relay is faulty if the coil is open. Are you sure it’s the relay behind the front panel that you are hearing and not a relay on the control board behind the user control panel? When low speed is selected, the relay is energized to select the low speed start winding and redirect power up to the control board. Do you have your meter set properly to read that high ohms value? Even if the relay is energizing, it could be a bad relay contact. Remove all the tape from around the relay and look through the clear relay cover for burnt contacts.
Added: They made some of these motor upgrade kits with relays made for 240vac coil voltage. Although they do work on 120vac, they should not be used. The coil resistance on the 240vac relays will read 13,600 ohms.
Eric
— Begin quote from fairbank56;816900
Sounds like the relay is faulty if the coil is open. Are you sure it’s the relay behind the front panel that you are hearing and not a relay on the control board behind the user control panel? When low speed is selected, the relay is energized to select the low speed start winding and redirect power up to the control board. Do you have your meter set properly to read that high ohms value? Even if the relay is energizing, it could be a bad relay contact. Remove all the tape from around the relay and look through the clear relay cover for burnt contacts.
Added: They made some of these motor upgrade kits with relays made for 240vac coil voltage. Although they do work on 120vac, they should not be used. The coil resistance on the 240vac relays will read 13,600 ohms.
Eric
— End quote
![]() Eric, Taa Daa! Problem appears solved, but not the path we expected. As soon as I touched the wires near the relay one of the double yellow ones going to the capacitor spade connector popped out, showing a burnt end. I suspect the repetitive action of the moving tub support around which the wire bundles are wrapped, combined with a very short wire from the relay to the rigid capacitor so it had no wiggle room, a factory installation that had the relay literally supported by the double yellow wires going to the capacitor, and the factory forcing two wires into a single-wire spade lug so one was not fully crimped, gradually caused one the yellow wires to flex and the strands to break individually until there were a few strands left. Those few chose this week to go Poof. The body of the relay does look a little cloudy inside, but no sign of burned contacts. I did some imagineering as I retaped the wires so that the relay weight is supported by the wire bundle coming down from the top of the machine, yet everything is free to move as much as the support rod can move. Once the yellow wires were repaired, I measured 3200 ohms from white to yellow at the motor plug. Next, all the functions passed in Service Mode. We just completed an uneventful wash load, which is a good thing. Happy --happy — happy!
Eric, Taa Daa! Problem appears solved, but not the path we expected. As soon as I touched the wires near the relay one of the double yellow ones going to the capacitor spade connector popped out, showing a burnt end. I suspect the repetitive action of the moving tub support around which the wire bundles are wrapped, combined with a very short wire from the relay to the rigid capacitor so it had no wiggle room, a factory installation that had the relay literally supported by the double yellow wires going to the capacitor, and the factory forcing two wires into a single-wire spade lug so one was not fully crimped, gradually caused one the yellow wires to flex and the strands to break individually until there were a few strands left. Those few chose this week to go Poof. The body of the relay does look a little cloudy inside, but no sign of burned contacts. I did some imagineering as I retaped the wires so that the relay weight is supported by the wire bundle coming down from the top of the machine, yet everything is free to move as much as the support rod can move. Once the yellow wires were repaired, I measured 3200 ohms from white to yellow at the motor plug. Next, all the functions passed in Service Mode. We just completed an uneventful wash load, which is a good thing. Happy --happy — happy!
The photo is pretty much as I found things when I went to see about the relay and discovered the broken yellow wire, except the capacitor bracket was tight. It’s a wonder the wire didn’t break long ago. I also noticed that the tape was quite chafed where it contacted the rod support at the bottom, so I reinforced that area.
So thanks loads — pun intended — for your knowledge and assistance to stick with me thru this. If you will send me your mailing address, I’d like to send a token of my appreciation … or at least make a charitable donation in your honor. Thanks again. Steve
That’s a sloppy install job by the GE technician. The capacitor and relay are not part of your original washer. It was required and added at the time of the installation of your new motor. He should not have wrapped the harness around the tub support rod like that. That rod gets a LOT of movement during agitation mode. The top of the relay should be facing upwards to protect the terminal connections from any water splashover from the tub. Anyway, good job on getting that fixed. No need for any donation. Always glad to help a DIY’er get their washer repaired. Especially those like yourself who have a clue what they are doing.
Eric
— Begin quote from fairbank56;816950
That’s a sloppy install job by the GE technician. The capacitor and relay are not part of your original washer. It was required and added at the time of the installation of your new motor. He should not have wrapped the harness around the tub support rod like that. That rod gets a LOT of movement during agitation mode. The top of the relay should be facing upwards to protect the terminal connections from any water splashover from the tub. Anyway, good job on getting that fixed. No need for any donation. Always glad to help a DIY’er get their washer repaired. Especially those like yourself who have a clue what they are doing.
Eric
— End quote
I stand corrected on thinking the factory did this botchery. I figured the wiring was installed that way at the factory to make sure it didn’t get near the blades of the exposed water pump that is directly beneath the capacitor. I’d love to see a photo of a factory installation — if the capicator, relay and water pump are in the same proximity — to see how they did the wire routing yet stayed away from the pump fan while allowing sufficient wire harness movement without putting a strain on anything. I wrapped the wiring harness around the rod similar to the way I found it — I just made sure the wires to the capacitor did not carry any weight, and kept the capacitor from rotating by taping it to the harness from the top of the washer. Now that I know what a mess I really had, I’d like to redo the wire routing while it’s on my mind, and totally unwrap the wiring harness from the support rod … if that is the intended method. Do you have a photo of a GE washer that shows that routing?
The original motor in your washer is no longer available which is why they offered the new motor with install kit. That kit includes the new pigtail wiring harness, capacitor and relay. The harness gets spliced into the old wiring and capacitor and relay get installed in the front cabinet. In newer washers that came from the factory with the new style motor, the capacitor and relay are installed inside the user control panel at the top. So there is no "factory" install of these components in the front cabinet. It’s up to the technician to get it right. Here’s a couple photo’s of one I did last year. The relay is taped to the new wiring harness in the upright position and the new wiring harness is tie-wrapped to the old one above the capacitor. The new wiring harness goes behind the suspension rod once where it is taped to prevent chafing. This is the way the original harness was routed. There is plenty of slack in the new wiring harness between where it comes from behind the rod to where it is tie-wrapped to the pump wiring above the cabinet clamp so that there is no tension at all on the wires attached to the relay and capacitor when the tub support is swinging during agitate.
Eric


— Begin quote from fairbank56;816995
The original motor in your washer is no longer available which is why they offered the new motor with install kit. That kit includes the new pigtail wiring harness, capacitor and relay. The harness gets spliced into the old wiring and capacitor and relay get installed in the front cabinet. In newer washers that came from the factory with the new style motor, the capacitor and relay are installed inside the user control panel at the top. So there is no "factory" install of these components in the front cabinet. It’s up to the technician to get it right. Here’s a couple photo’s of one I did last year. The relay is taped to the new wiring harness in the upright position and the new wiring harness is tie-wrapped to the old one above the capacitor. The new wiring harness goes behind the suspension rod once where it is taped to prevent chafing. This is the way the original harness was routed. There is plenty of slack in the new wiring harness between where it comes from behind the rod to where it is tie-wrapped to the pump wiring above the cabinet clamp so that there is no tension at all on the wires attached to the relay and capacitor when the tub support is swinging during agitate.
Eric
— End quote
Thank you for those photos. A far cry from what was done to the wire routing here. I untaped everything & rerouted per your photos as best I could without recutting anything. I did a couple of things differently. I attached the tiewrap near the motor from the top, which placed the harness well above the tie rod bracket. (I attached it from the bottom yesterday and it had already pulled out of its hole). I ran a new tiewrap thru a hole that’s an inch above the capacitor mount so it would prevent the capacitor from rotating, which it wanted to do no matter how tight I got the bracket screw. The tiewrap also went around the relay, which now points up, so that will stay put. No more strain on any connectors and plenty of wiggle room for the harness. As you can see from the photo, it’s not as neat as yours but should be more than adequate. Thanks for everything. If you ever get near Greenville, SC, look me up. Dinner’s on me!